
I still remember the first time I baked with chestnut flour. It was a chilly autumn afternoon, and the scent of roasted chestnuts filled my grandmother’s kitchen. She always had a way of turning simple ingredients into something magical, and that day, she handed me a bag of finely ground chestnut flour with a knowing smile.
“Try this in your cookies,” she said. “It’ll remind you of the roasted chestnuts we used to eat by the fireplace.”
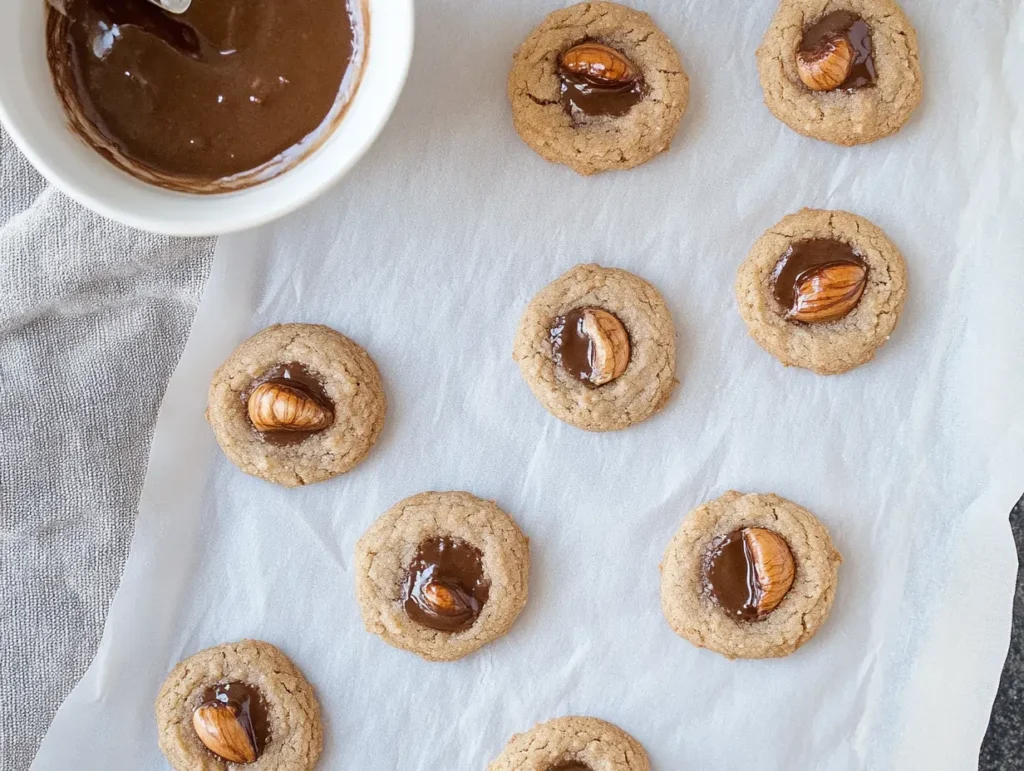
I followed her advice, replacing regular flour in my favorite thumbprint cookie recipe. The result? Soft, slightly sweet cookies with a delicate nutty flavor that melted in my mouth. As I filled the warm indentations with homemade raspberry jam, I knew I had discovered something special.
Since then, chestnut flour thumbprint cookies have become a staple in my kitchen—perfect for cozy afternoons, holiday baking, or simply when I crave something unique. Unlike traditional wheat flour, chestnut flour adds a natural sweetness and richness that makes these cookies stand out. Plus, it’s naturally gluten-free, making it a great choice for those with dietary restrictions.
Whether you love baking with alternative flours or are just looking for a delicious new cookie recipe, these thumbprint cookies are sure to become a favorite. Let’s get baking!
Ingredients You’ll Need
These chestnut flour thumbprint cookies are made with simple, wholesome ingredients that bring out their rich, nutty flavor and soft texture. Here’s what you’ll need:
Dry Ingredients:
- 1 ½ cups chestnut flour – The key ingredient for a naturally sweet, nutty flavor and a soft, tender cookie.
- ½ teaspoon baking powder – Helps the cookies rise slightly for a light texture.
- ¼ teaspoon salt – Enhances flavor and balances the sweetness.
Wet Ingredients:
- ½ cup unsalted butter (or coconut oil for dairy-free option) – Adds richness and moisture to the cookies.
- ¼ cup honey or maple syrup – A natural sweetener that complements the flavor of chestnut flour.
- 1 large egg (or flax egg for a vegan version) – Helps bind the dough together.
- 1 teaspoon vanilla extract – Adds depth of flavor and warmth to the cookies.
For the Filling:
- ½ cup fruit jam (raspberry, apricot, or fig work best) – Adds a fruity contrast to the nutty cookie base.
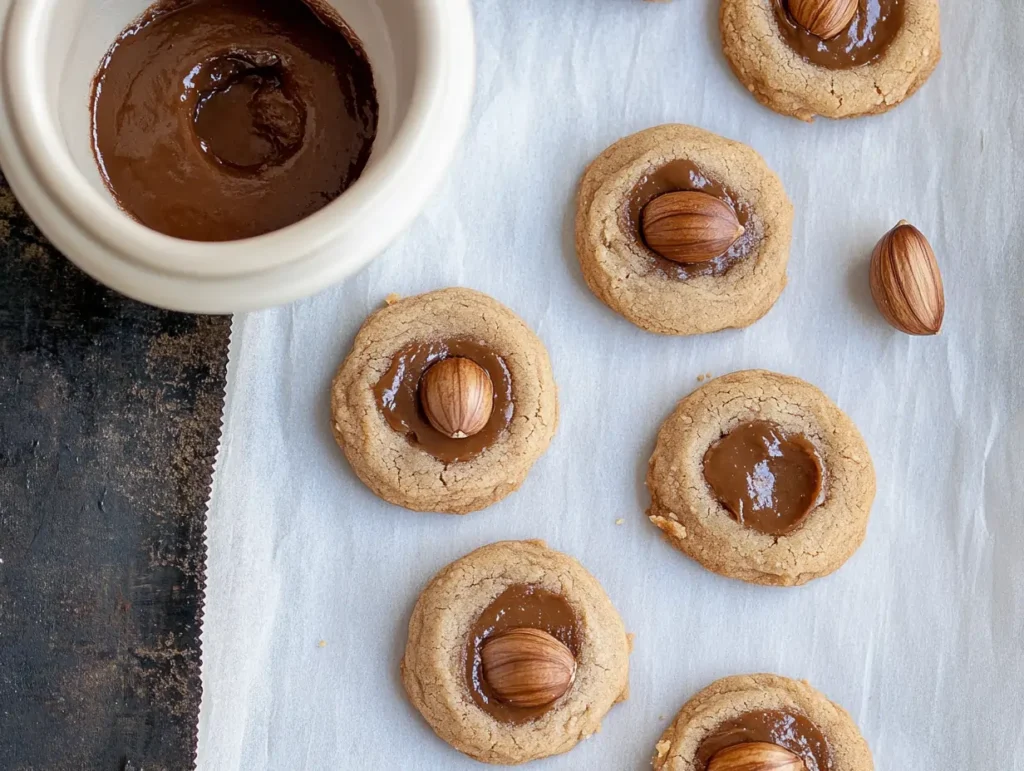
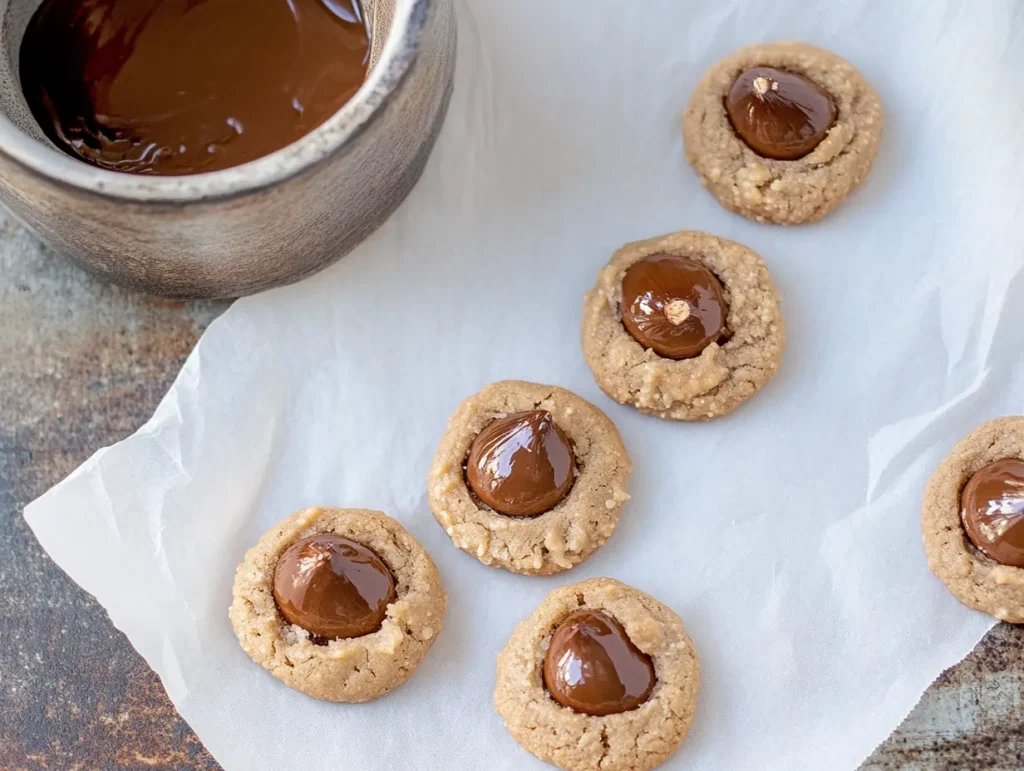
- OR ½ cup melted dark chocolate – For a rich and indulgent variation.
- OR ½ cup nut butter (almond, hazelnut, or peanut butter) – A creamy, protein-packed alternative.
Optional Add-Ins:
- ½ teaspoon cinnamon or nutmeg – For a warm, spiced flavor, perfect for fall and winter.
- Zest of 1 orange – Adds a fresh citrusy note that pairs beautifully with chestnut flour.
- 2 tablespoons finely chopped nuts – For extra crunch and texture.
With these simple ingredients, you’ll create cookies that are naturally gluten-free, slightly sweet, and full of deep, nutty flavors. Now, let’s move on to the step-by-step process of making them!
Step-by-Step Instructions: How to Make Chestnut Flour Thumbprint Cookies
Follow these simple steps to create soft, nutty, and delicious thumbprint cookies with chestnut flour.
Step 1: Preheat & Prepare
Preheat your oven to 350°F (175°C) and line a baking sheet with parchment paper to prevent sticking.
Step 2: Mix the Dry Ingredients
In a medium bowl, whisk together:
- Chestnut flour
- Baking powder
- Salt
Set aside.
Step 3: Cream Butter & Sweetener
In a separate large bowl, use a hand mixer or whisk to beat together:
- Butter (or coconut oil)
- Honey or maple syrup
- Vanilla extract
Mix until smooth and creamy.
Step 4: Add the Egg & Combine
- Beat in the egg (or flax egg) until fully incorporated.
- Slowly add the dry ingredients to the wet mixture, stirring until a soft dough forms.
Step 5: Shape & Make Thumbprints
- Scoop out about 1 tablespoon of dough and roll it into a ball.
- Place it on the lined baking sheet and gently press your thumb into the center to create an indentation.
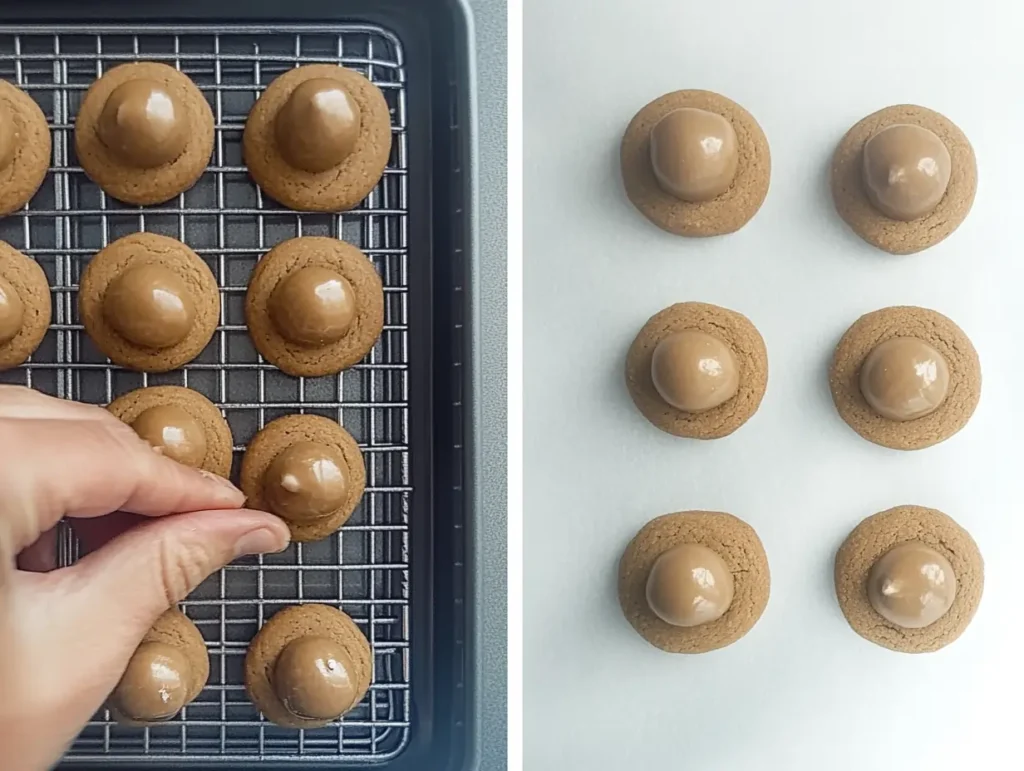
Step 6: Fill the Cookies
- Spoon about ½ teaspoon of jam, melted chocolate, or nut butter into each thumbprint.
Step 7: Bake to Perfection
- Bake for 10-12 minutes, or until the edges are lightly golden.
- Remove from the oven and let them cool on the baking sheet for 5 minutes before transferring to a wire rack.
Step 8: Enjoy!
These chestnut flour thumbprint cookies are best enjoyed warm with a cup of tea or coffee. Store leftovers in an airtight container for up to 5 days.
Lisa’s Tips for Perfect Chestnut Flour Thumbprint Cookies
Baking with chestnut flour is a little different from using traditional wheat flour, but with the right tips, you’ll get soft, nutty, and perfectly textured thumbprint cookies every time.
1. Use High-Quality Chestnut Flour
Not all chestnut flours are the same. Look for finely ground chestnut flour with a mild, slightly sweet aroma. Coarser flours can make the cookies dry or grainy.
Tip: Store chestnut flour in an airtight container in the fridge or freezer to keep it fresh longer.
2. Don’t Skip Chilling the Dough
Chestnut flour has a delicate texture, and chilling the dough for 15-20 minutes before rolling helps prevent spreading during baking.
Tip: If the dough feels too soft, refrigerate it for a bit longer before shaping the cookies.
3. Make Deep Thumbprints
Since the cookies puff slightly in the oven, make the thumbprints deep enough to hold the filling without disappearing as they bake.
Tip: Use the back of a teaspoon instead of your thumb for a more uniform shape.
4. Choose the Right Filling
The nutty sweetness of chestnut flour pairs well with a variety of fillings. Here are some favorites:
- Fruit jams (raspberry, apricot, or fig) for a classic, slightly tart contrast.
- Melted dark chocolate for a rich, indulgent twist.
- Nut butters (almond, hazelnut, or peanut) for extra creaminess and protein.
Tip: If using jam, stir it well before adding to prevent uneven textures.
5. Watch the Bake Time
Chestnut flour browns faster than wheat flour, so keep an eye on your cookies. They should be lightly golden on the edges but still soft in the center.
Tip: If your oven runs hot, check the cookies at 9 minutes to avoid overbaking.
6. Let Them Cool Before Moving
Chestnut flour cookies are delicate when warm. Let them cool on the baking sheet for at least 5 minutes before transferring to a wire rack.
Tip: If they seem too crumbly, let them rest a little longer before handling.
7. Store Them Properly
Keep cookies in an airtight container at room temperature for up to 5 days or refrigerate for a longer shelf life.
Tip: For a firmer texture, store them in the fridge and enjoy chilled!
Serving Suggestions for Chestnut Flour Thumbprint Cookies
These chestnut flour thumbprint cookies are delicious on their own, but pairing them with the right drink or snack can take your experience to the next level. Here are some great ways to enjoy them:
1. Pair with a Smoothie for a Nutritious Snack
For a balanced treat, enjoy these cookies with a creamy, protein-packed drink like this Peanut Butter Smoothie Without Banana. The nutty flavors of the smoothie complement the chestnut flour beautifully, creating a satisfying and energy-boosting snack.
2. Serve with Coffee or Tea for a Cozy Treat
The natural sweetness of chestnut flour pairs wonderfully with warm beverages. Try them with:
- A latte or cappuccino for a comforting afternoon break.
- Chai tea or earl grey to enhance the spiced flavors.
- A cup of hot cocoa for a rich and indulgent pairing.
3. Make It a Dessert Platter
For gatherings or special occasions, serve these cookies as part of a dessert spread with:
- Dark chocolate pieces for an extra indulgent treat.
- Fresh berries like raspberries or figs to contrast the nutty sweetness.
- A scoop of vanilla or hazelnut ice cream for a more decadent dessert.
4. Enjoy as a Holiday Treat
These cookies are perfect for the holiday season! Serve them alongside other festive treats like gingerbread cookies or spiced cakes for a warm, cozy dessert platter.
Creative Variations of Chestnut Flour Thumbprint Cookies
These chestnut flour thumbprint cookies can be easily customized for different flavors and textures. Here are six delicious ways to switch them up:
1. Chocolate Chestnut Thumbprints
For a rich and indulgent twist, fill the cookies with melted dark chocolate or chocolate ganache instead of jam. The deep chocolate flavor pairs beautifully with the nutty sweetness of chestnut flour.
2. Spiced Holiday Thumbprints
Add ½ teaspoon cinnamon, ¼ teaspoon nutmeg, and a pinch of cloves to the dough for a festive touch. Fill the thumbprints with orange marmalade or cranberry jam to enhance the warm holiday flavors. If you love holiday baking, check out this Christmas Cookie Cake for more inspiration.
3. Nut Butter Thumbprints
Instead of fruit jam, use almond butter, peanut butter, or hazelnut spread for a creamy and protein-packed variation. A sprinkle of sea salt on top adds an extra depth of flavor. For another nutty treat, try this Peanut Butter Smoothie Without Banana.
4. Citrus Zest Thumbprints
Brighten up the flavor by adding orange or lemon zest to the cookie dough. Fill the thumbprints with lemon curd, lime marmalade, or grapefruit jelly for a refreshing twist.
5. Caramel Pecan Thumbprints
For a buttery, nutty variation, fill the cookies with homemade caramel sauce and top with chopped toasted pecans or walnuts. If you enjoy layered desserts with deep flavors, you might also like this Mounds Bar Cake Recipe.
6. Mocha Chestnut Thumbprints
Add ½ teaspoon instant coffee or espresso powder to the dough for a subtle mocha flavor. Fill the thumbprints with coffee-flavored chocolate ganache for a bold and sophisticated touch.
Each of these variations brings out the best in chestnut flour thumbprint cookies, making them perfect for different tastes and occasions.
How to Store Chestnut Flour Thumbprint Cookies
To keep your chestnut flour thumbprint cookies fresh and delicious, follow these simple storage tips:
1. Room Temperature (Best for Short-Term Storage)
- Store the cookies in an airtight container at room temperature for up to 3 days.
- If using jam or nut butter fillings, place parchment paper between layers to prevent sticking.
- Keep them in a cool, dry place away from direct sunlight to maintain freshness.
2. Refrigerator (Best for Extended Freshness)
- If you need to store them for longer, place the cookies in an airtight container and refrigerate for up to 7 days.
- This is especially useful for fillings like caramel, chocolate, or cream-based toppings that may soften at room temperature.
3. Freezer (Best for Long-Term Storage)
- To freeze, arrange the cookies in a single layer on a baking sheet and freeze for 1 hour until firm.
- Transfer them to a freezer-safe container or zip-top bag, placing parchment paper between layers to prevent sticking.
- Store for up to 2 months. When ready to eat, thaw at room temperature for about 15-20 minutes.
4. Storing Unbaked Dough
- If you want to prepare the cookies ahead of time, roll the dough into balls and store them in an airtight container in the refrigerator for up to 3 days.
- You can also freeze the dough for up to 2 months. When ready to bake, let it thaw slightly at room temperature before shaping and filling.
FAQs About Chestnut Flour Thumbprint Cookies
1. Can I substitute chestnut flour with another flour?
Yes, but the texture and flavor will change. Almond flour is the closest substitute, offering a similar nutty taste. You can also use a mix of oat flour and almond flour if you prefer a lighter texture.
2. Why is my dough too crumbly?
Chestnut flour absorbs moisture differently than wheat flour. If your dough feels too dry, try adding an extra teaspoon of melted butter or a splash of milk to help bind it together.
3. What are the best fillings for these cookies?
Traditional jams like raspberry, apricot, or fig work well. For a richer taste, try melted chocolate, nut butters, caramel, or even lemon curd for a citrusy twist.
4. How do I prevent my thumbprints from losing their shape while baking?
Make a deep indentation in the dough before baking, as the cookies slightly puff up in the oven. You can also chill the dough for 15-20 minutes before baking to help maintain its shape.
5. Are these cookies gluten-free?
Yes! Chestnut flour is naturally gluten-free and grain-free, making these cookies a great option for those with gluten sensitivities. Just ensure that all other ingredients used are certified gluten-free.
Conclusion & Final Thoughts
Chestnut flour thumbprint cookies are a delicious, naturally gluten-free treat with a unique nutty sweetness. Whether you fill them with fruit jam, chocolate, nut butter, or caramel, these cookies offer endless possibilities for customization.
With their soft texture, deep flavor, and easy-to-make recipe, they’re perfect for everyday snacking, holiday baking, or sharing with friends and family. Plus, they store well, so you can enjoy them fresh or save a batch for later.
Now it’s time to get baking! Try this recipe, experiment with different fillings, and let me know which version is your favorite. Happy baking! 😊
Print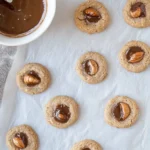
Best Chestnut Flour Thumbprint Cookies – Gluten-Free & Easy Recipe
- Total Time: 22 minutes
- Yield: 12-14 cookies
Description
These chestnut flour thumbprint cookies are soft, nutty, and naturally gluten-free. Made with wholesome chestnut flour, they have a slightly sweet flavor and a delicate texture, perfect for any occasion. Fill them with melted chocolate, fruit jam, or nut butter for a customizable treat. Easy to make and perfect for gluten-free baking!
Ingredients
Dry Ingredients:
- 1 ½ cups chestnut flour – Adds natural sweetness and a nutty flavor.
- ½ teaspoon baking powder – Helps create a light texture.
- ¼ teaspoon salt – Balances the sweetness and enhances the flavors.
Wet Ingredients:
- ½ cup unsalted butter (or coconut oil for dairy-free option) – Adds moisture and richness.
- ¼ cup honey or maple syrup – A natural sweetener that complements the chestnut flour.
- 1 large egg (or flax egg for a vegan version) – Helps bind the dough.
- 1 teaspoon vanilla extract – Enhances the warm, sweet flavor.
For the Filling:
- ½ cup melted dark chocolate – For a rich, indulgent center.
- OR ½ cup fruit jam (raspberry, apricot, or fig) – Adds a fruity contrast.
- OR ½ cup nut butter (almond, hazelnut, or peanut butter) – A creamy, protein-packed option.
Instructions
- Preheat & Prepare:
- Preheat the oven to 350°F (175°C).
- Line a baking sheet with parchment paper.
- Mix the Dry Ingredients:
- In a bowl, whisk together the chestnut flour, baking powder, and salt. Set aside.
- Cream Butter & Sweetener:
- In a separate large bowl, beat butter (or coconut oil), honey (or maple syrup), and vanilla extract until smooth.
- Add the Egg & Combine:
- Mix in the egg (or flax egg) until fully incorporated.
- Gradually add the dry ingredients, stirring until a soft dough forms.
- Shape & Make Thumbprints:
- Roll about 1 tablespoon of dough into balls and place them on the baking sheet.
- Press your thumb or the back of a spoon into the center of each cookie to create an indentation.
- Fill the Cookies:
- Spoon about ½ teaspoon of melted chocolate, jam, or nut butter into each indentation.
- Bake & Cool:
- Bake for 10-12 minutes or until the edges are lightly golden.
- Let the cookies cool on the baking sheet for 5 minutes, then transfer them to a wire rack.
- Serve & Enjoy:
-
- Enjoy warm or store them in an airtight container for later!
Notes
- Chilling the dough for 15 minutes before baking helps maintain the shape.
- If the dough feels too dry, add a teaspoon of melted butter or milk.
- For a sugar-free version, replace honey or maple syrup with monk fruit sweetener.
- Store in an airtight container at room temperature for 3 days, in the fridge for up to 7 days, or freeze for up to 2 months.
- Prep Time: 10 minutes
- Cook Time: 12 minutes
- Category: Dessert
- Method: Baking
- Cuisine: Gluten-Free, Healthy Baking
Keywords: Chestnut Flour Thumbprint Cookies, gluten-free cookies, healthy thumbprint cookies, chestnut flour recipes, chocolate thumbprint cookies, easy gluten-free dessert